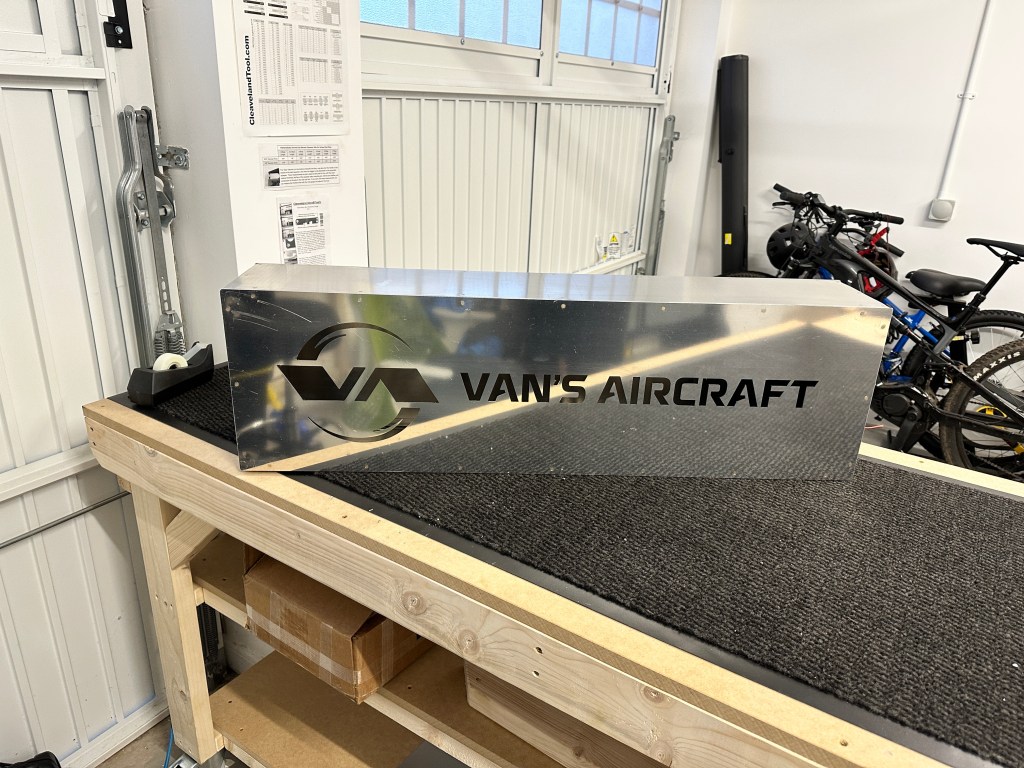
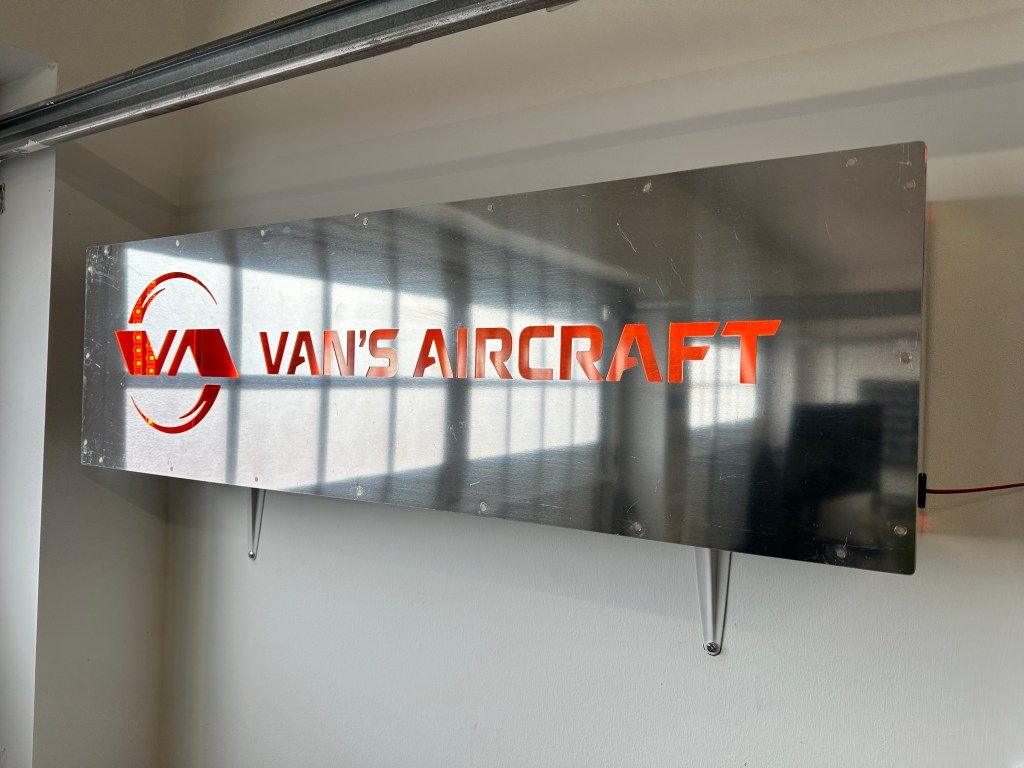
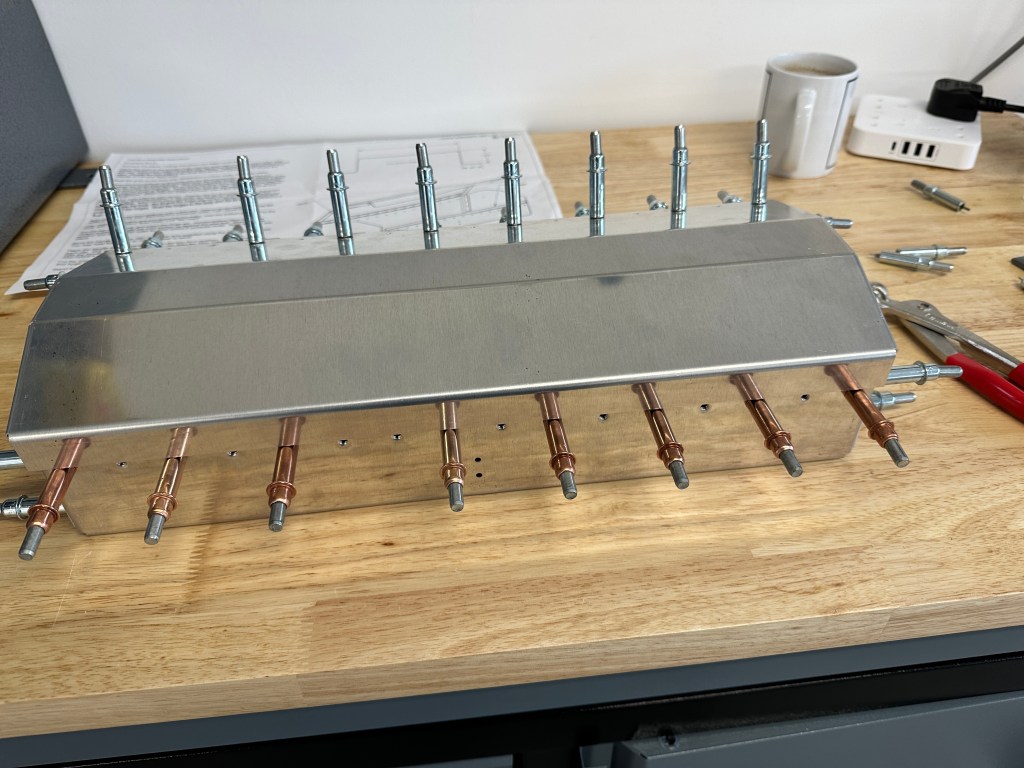
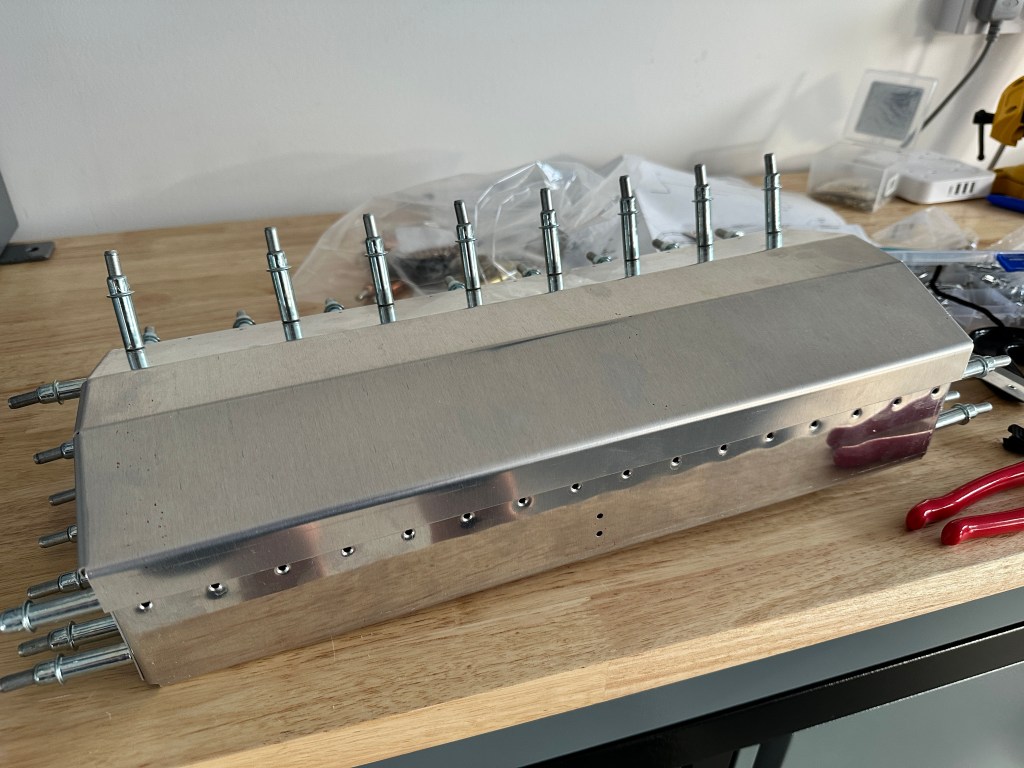
I’ve had the lightbox kit for a couple of months but hadn’t yet got around to building it, however my empennage kit is in the UK and due to be delivered in a couple of days, so it was time to get this project ticked off!
Fairly simple to but together, and it gave me the chance to try a few new tools that I had got with the Cleveland kit such as the pneumatic squeezer – as I didn’t have those tools when I built the toolbox project.
It didn’t take long for me to make a mess of the workspace – will need to keep this tidier when building the real kit!
Workbench is a mess! Just the lighting to addMounted on the wall
I’ve had the email to let me know that my empennage kit has shipped, super excited to start this project, but I’ll admit getting that email made me think “Am I ready? Can I do this? Is this crazy!?”…
My workshop is ready, I’ve got the tools, I’ve built the toolbox, so I think the answer is yes – but it’s a meaty project that requires determination to finish, and so I think those thoughts were healthy!
Due to the laser cut parts issue I have got a significant number of parts on back order, so it looks like I won’t be able to build unencumbered, but I’m sure there’s plenty still to do!
Here’s my backordered parts list:
Part Number
Description
Quantity
F-01486C-L
J-Stiffener, Aft Fuse
1
F-01486C-R
J-Stiffener, Aft Fuse
1
F-01410
Bulkhead
1
F-01411A
Bulkhead
1
F-01411B
Bulkhead
1
VS-705
Nose Rib
1
R-912
Rudder C.Balance Rib
1
VS-704
Root Rib
1
VS-706
Tip Rib
1
VS-707
Tip Rib
1
E-903
Elevator Tip Rib
2
E-905
Left Elevator Rib 9/10
1
R-903
Rudder Top Rib
1
E-1008
Elevator Rib
12
E-01402
Elevator Trim Cover
1
E-904
Elevator Tip Rib
2
F-01412A
Bulkhead
1
F-01412B
Bulkhead
1
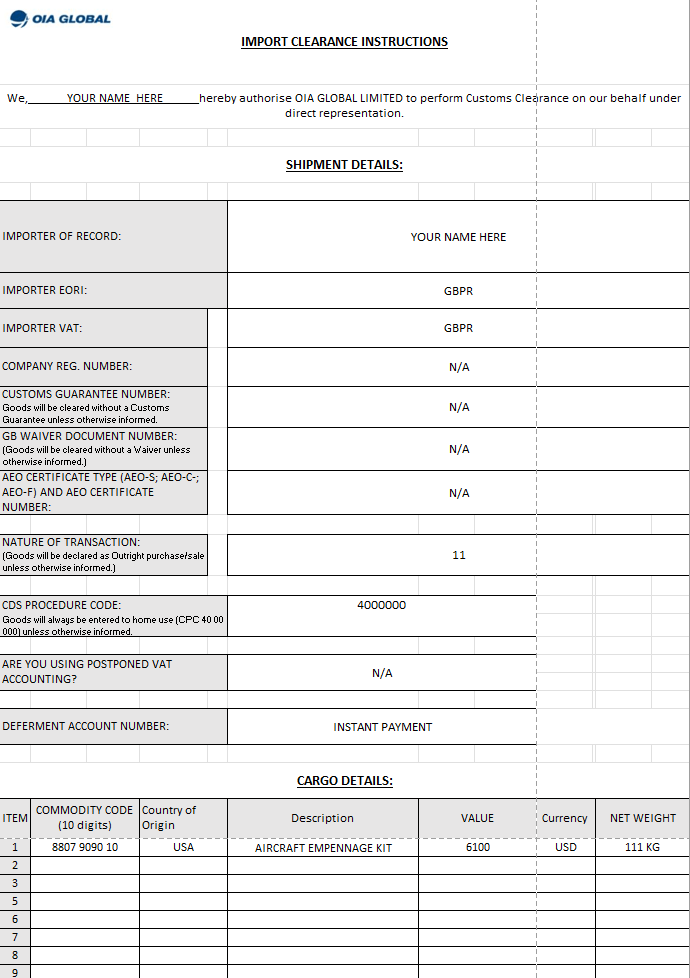
If you’re a UK builder, then part of the process involved filling out forms with OIA Global which are the shipping company dealing with the import, the forms weren’t straightforward, but after asking some folks in the RV14 UK WhatsApp I soon got the answers.
Here’s a copy of the forms for anyone who needs it for the future, I’ve removed my details and on the clearance form remember to change the cargo details to match what you have, I’ve left my emp kit as an example:
After some persuasion my wife agreed to let my son and I leave the family holiday in Orlando to head to Oshkosh for 2 days – I know it’s not enough, and I won’t see it all – but it’s something! I have made a list of vendors I want to see, and then anything else on top will be a bonus.
I’ll try and take some notes, and photos and share anything interesting that I see on the blog, which will help me remember things as the build progresses!
Here’s my working list of vendors that I will try and visit if they have a stand, I’ll do some checking against the exhibitor list soon and make a note of where I can find them so I can be efficient!
Vans Aircraft – Kits
Homebuilt Aircraft Display (604, 605, 618, 619)
Evoke – Design
Homebuilt Aircraft Display (615)
Flyleds – Lighting
Homebuilt Aircraft Display (644)
Flyboy Accessories
Homebuilt Aircraft Display (644)
Cleveland Aircraft Tool
Homebuilt Aircraft Display (617)
Garmin – Avionics
Main Aircraft Display (347)
Hartzell – Propeller
Main Aircraft Display (296, 297)
Beringer – Brakes
Main Aircraft Display (437)
Lycoming – Engine
Main Aircraft Display (277)
Vertical Power
Exhibit Hangar C (3167)
AeroLED – Lighting
Exhibit Hangar C (3032)
Stein Air – Avionics
Exhibit Hangar C (3033, 3034)
EarthX – Battery
Exhibit Hangar C (3159)
Trig – Radios
Exhibit Hangar C (3130)
Dynon – Avionics
Exhibit Hangar D (4034, 4035B, 4035, 4035A, 496)
Aircraft Specialty Flightlines – Fuel/Brake Lines
Ultralight/Rotorcraft Display (949, 948
Aerotronics – Avionics
Exhibit Hangar A (1074, 1075)
Tosten – Grip
Exhibit Hangar B (2141)
Not located these vendors yet, so they may not be attending
JD Air Parts (Canopy Latch, Fuel Tank Rings)
Classic Aero Interiors (Interior)
Midwest Panels (Avionics, Panel + Intellikey)
Lemke – Interior (EU)
If you think I’ve missed anyone, then do let me know!
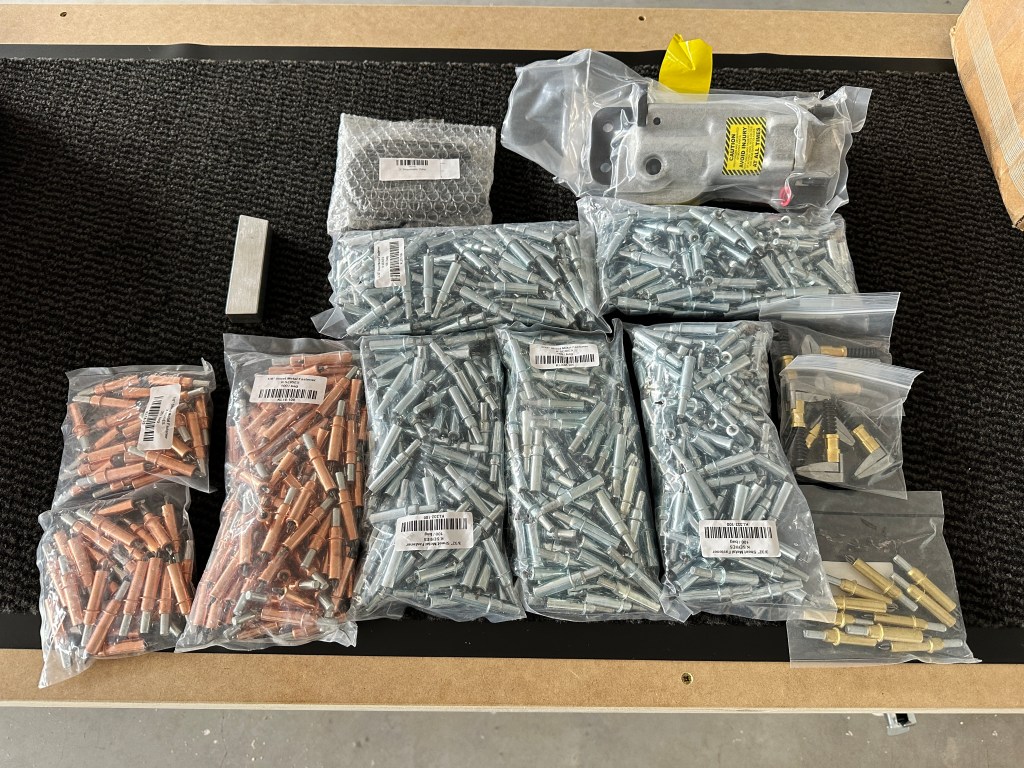
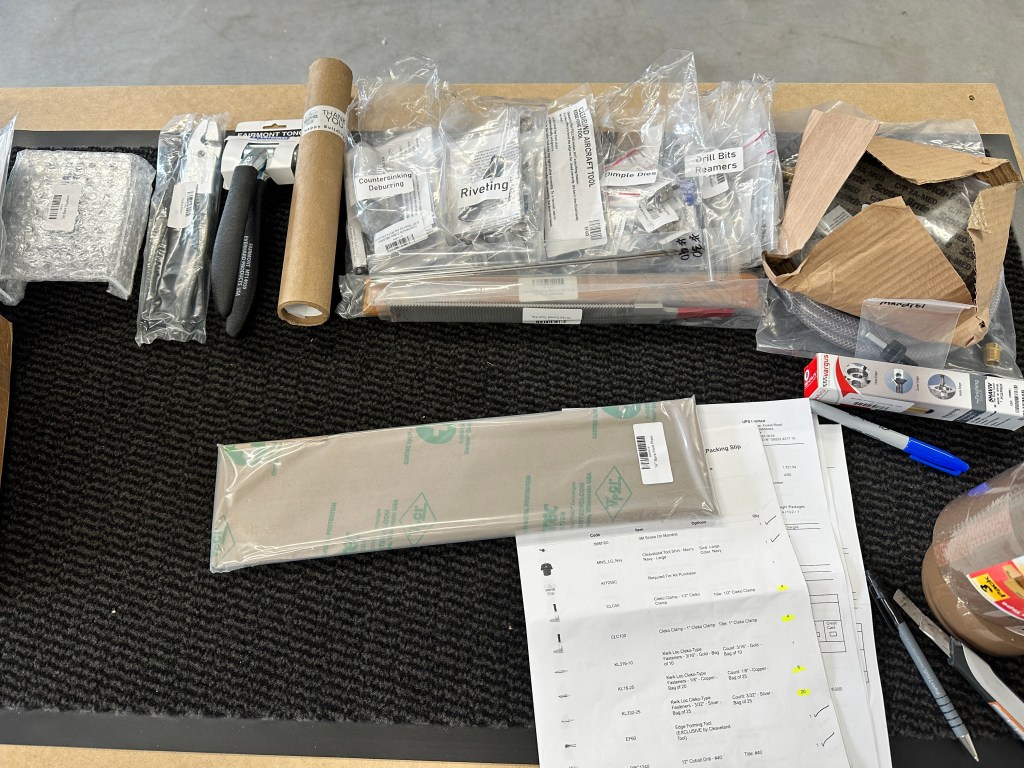
Having done lots of research, there’s really only one place to buy quality tools that come with the recommendation of many builders, and that’s Cleveland Aircraft Tool – so I went ahead and placed my order, I excluded a couple of items I already had, but otherwise went with their full kit! Even grabbed myself a t-shirt also!
I placed my order, and then had a shipping notification 24 hrs later, and they arrived in the UK within days of that – really impressive, I’d expected to have to wait a while.
After paying what feels like an excessive amount of duty the boxes arrived and I did a quick inventory and all are accounted for!
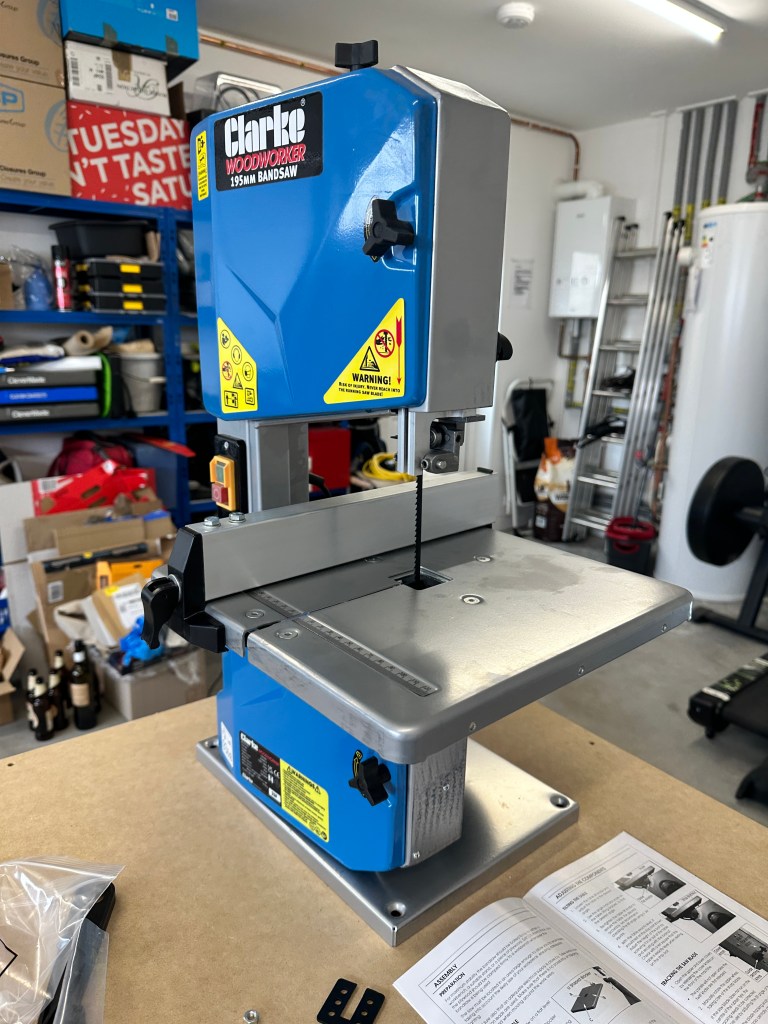
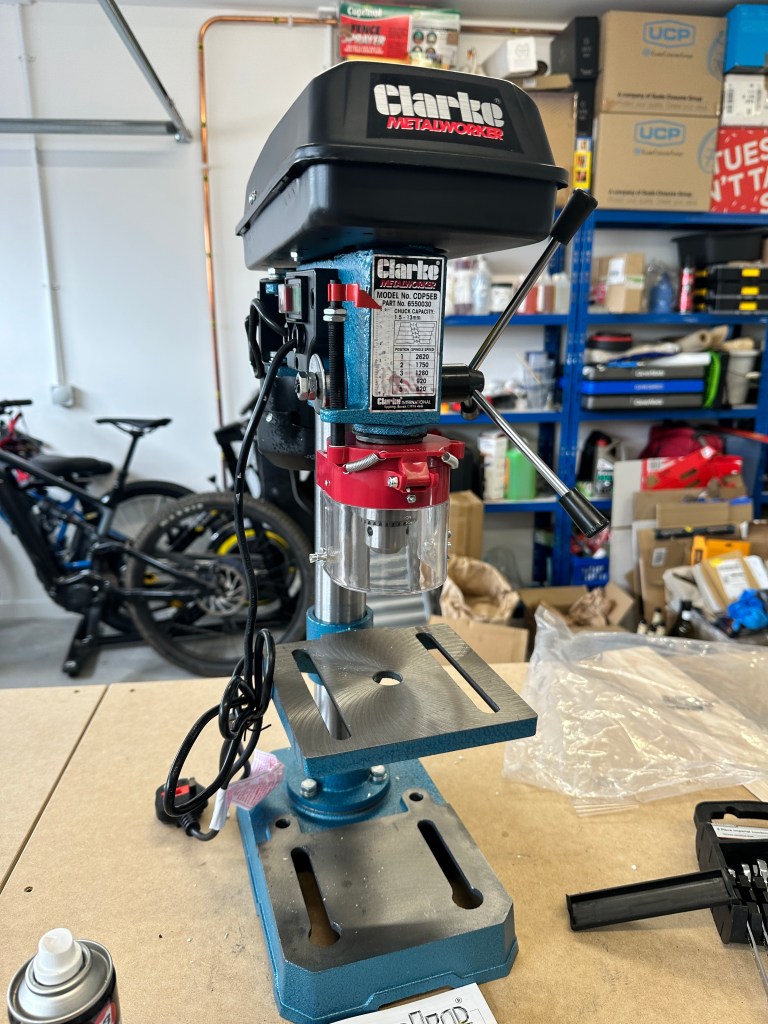
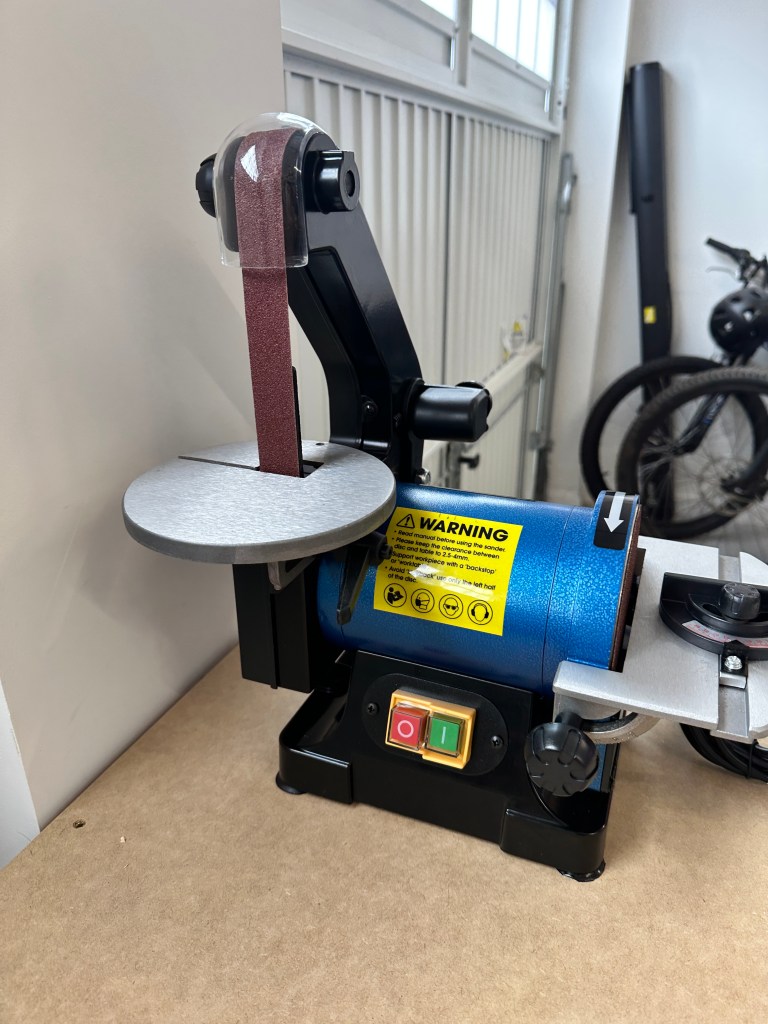
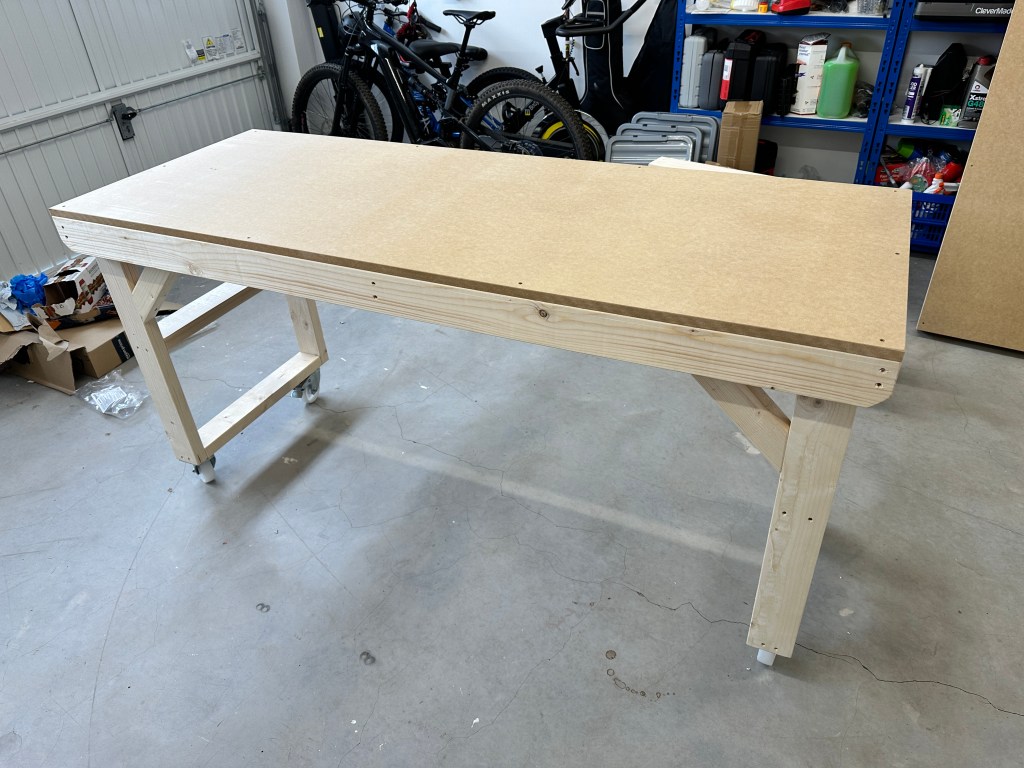
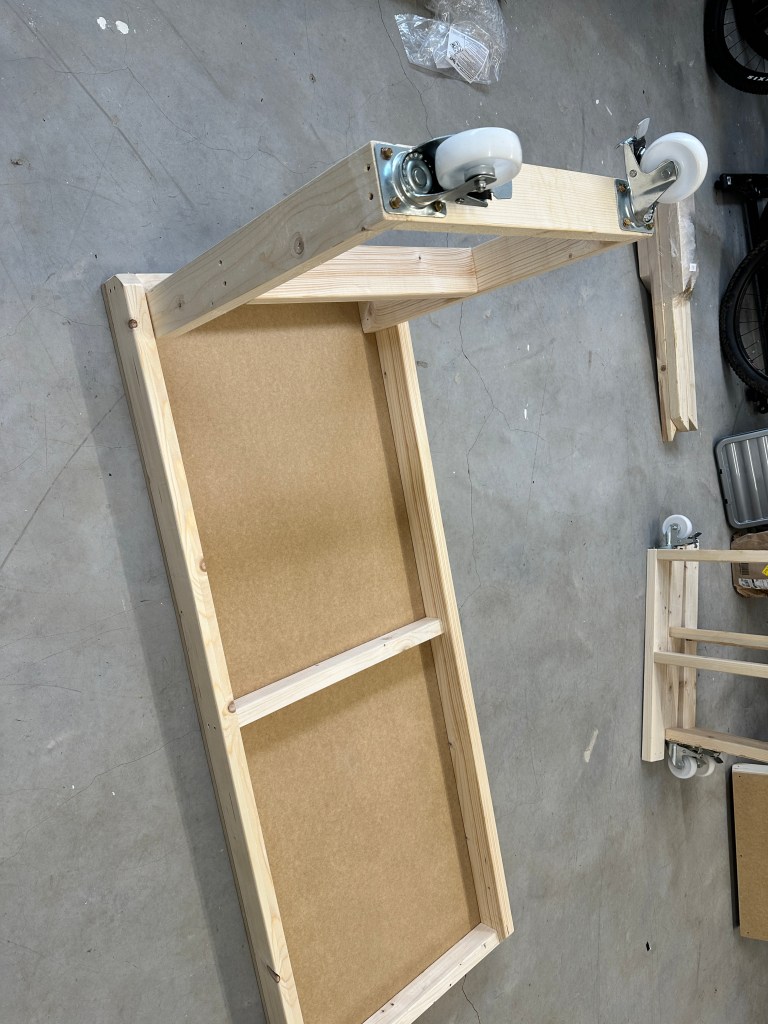
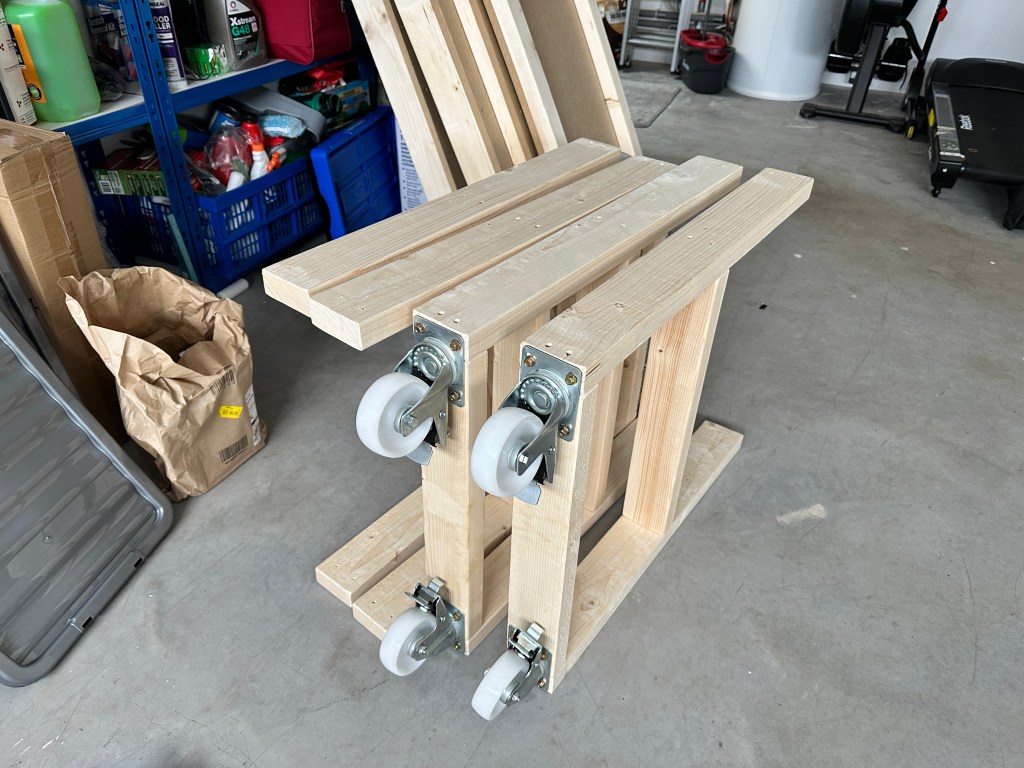
I’d also ordered the recommended power tools, and those all arrived – so I set about setting them up, like others have done I plan on creating (or maybe buying) a small workbench to mount them to on wheels and have the ability to move them around the workshop as needed!
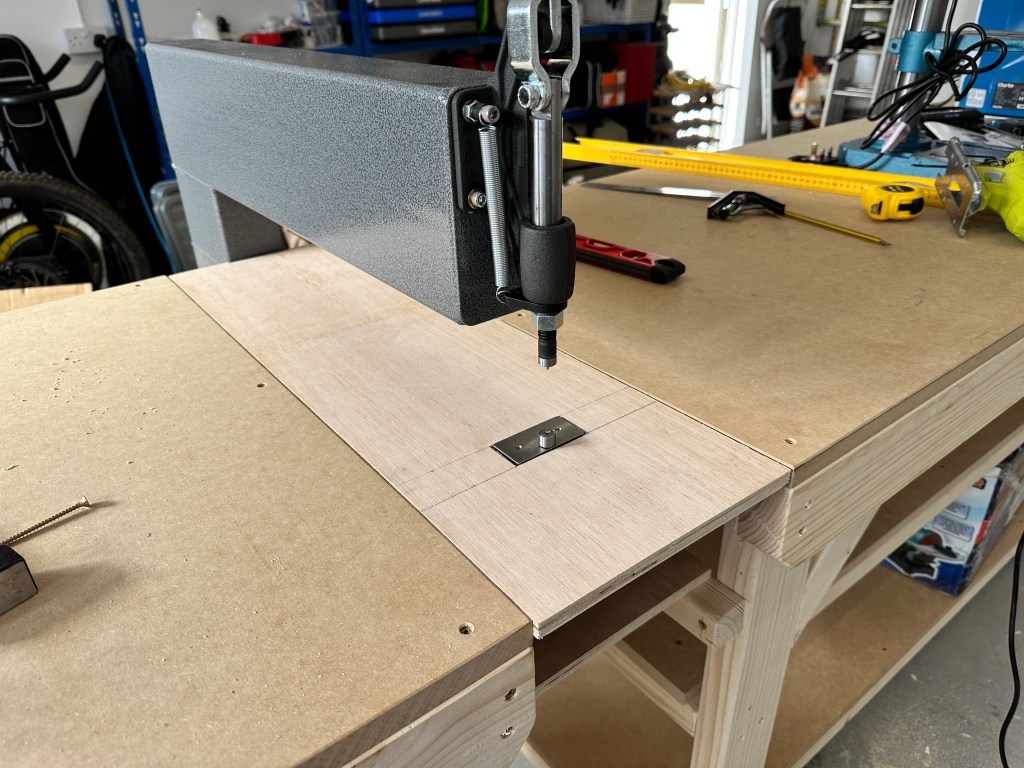
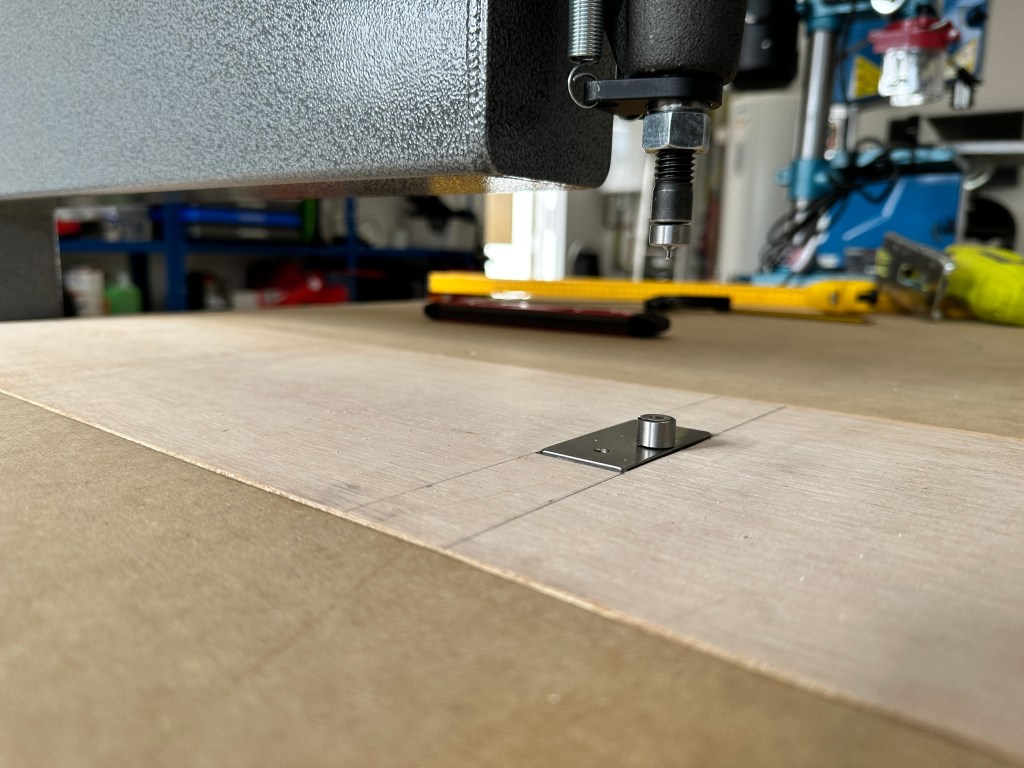
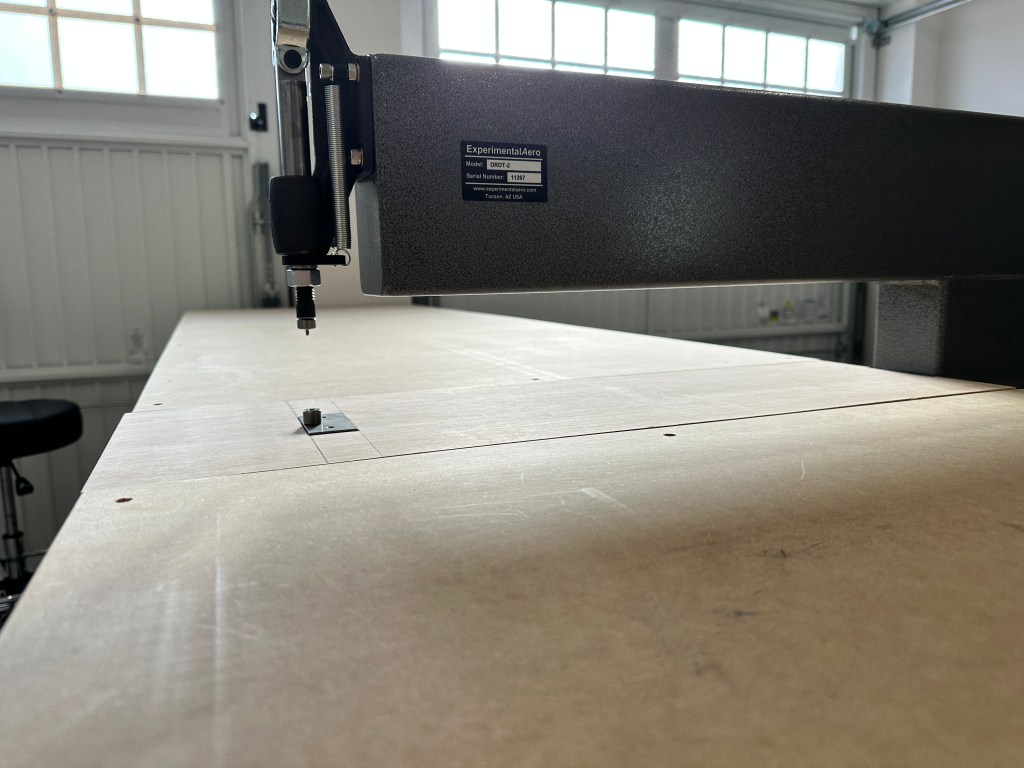
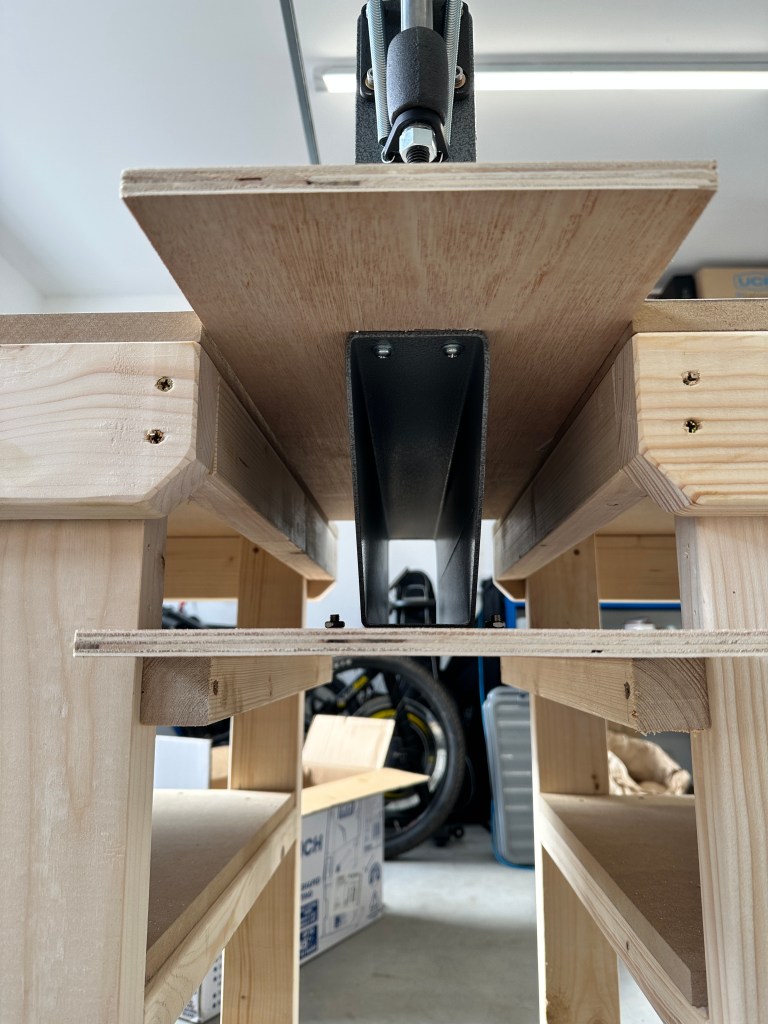
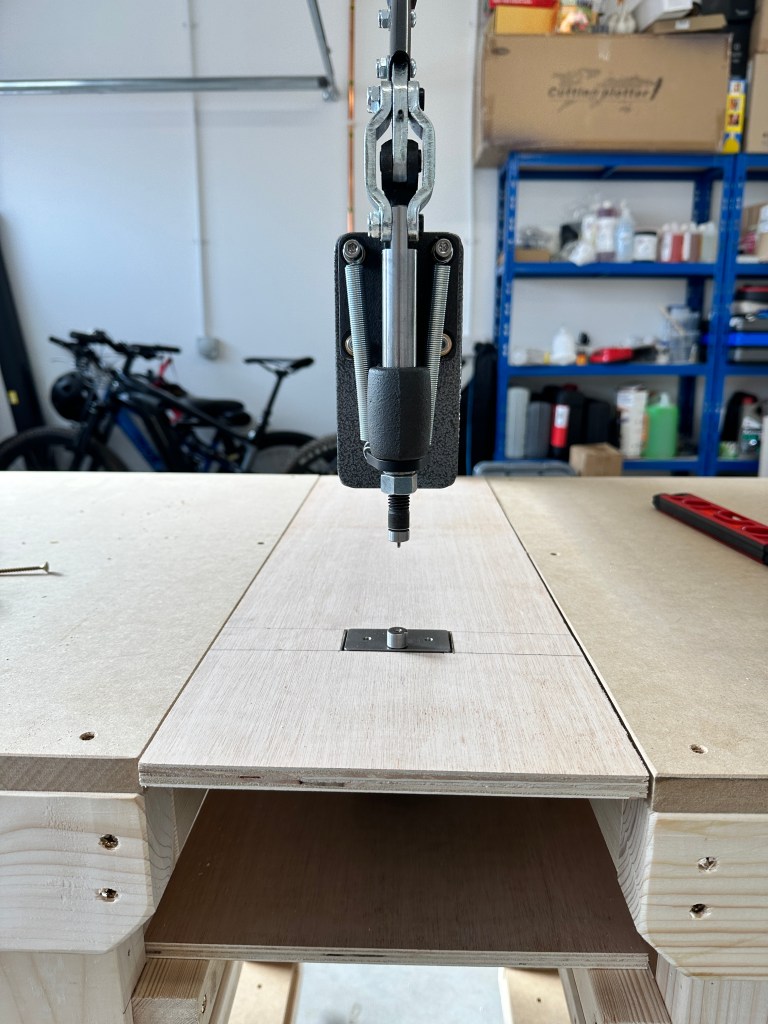
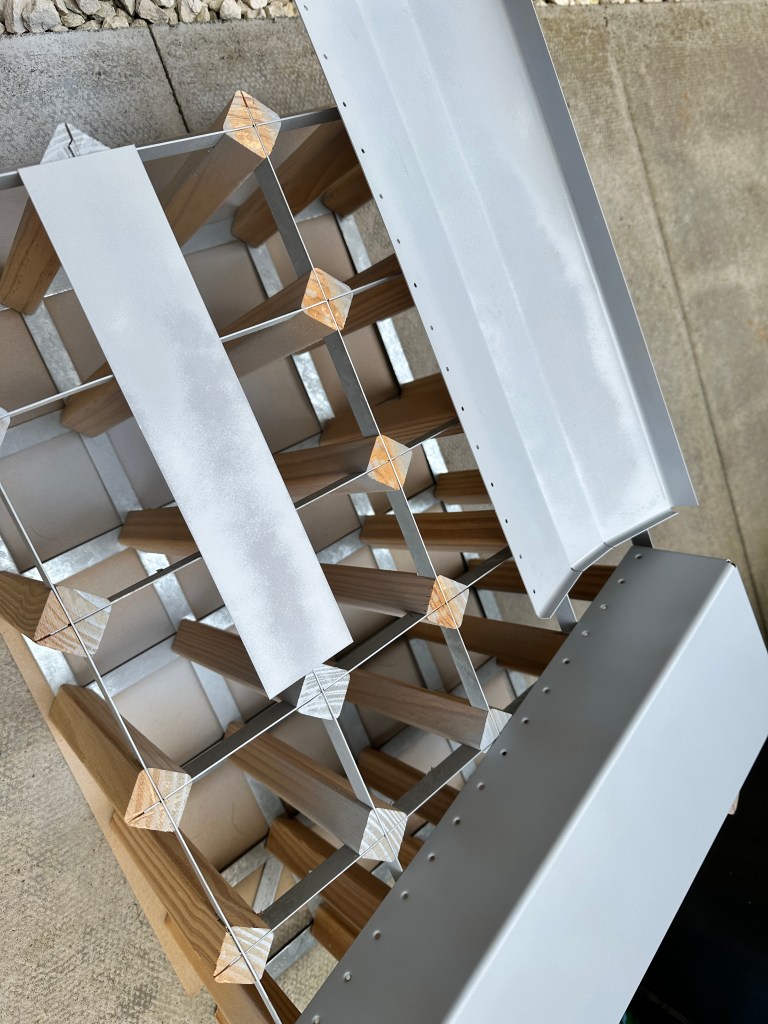
Taking inspiration from Steve’s website, and specifically this page where he shows the DRDT2 mounted between his workbenches using a shelf – I decided to follow in his footsteps and do the same!
Overall building this probably only took an hour or so, mainly due to thinking it through as I went rather than going in with any particular plan – simple to do and I’m really happy with the end result.
I won’t know for sure if this is good enough until I get the kit, but if it worked for Steve I’m sure it’ll work for me.
Here’s a timelapse video of the work, with some narrative (I’ll fix the slight pulsing of the lights for the next one hopefully!):
Here’s some photos of the finished surface, which I’m super pleased with!
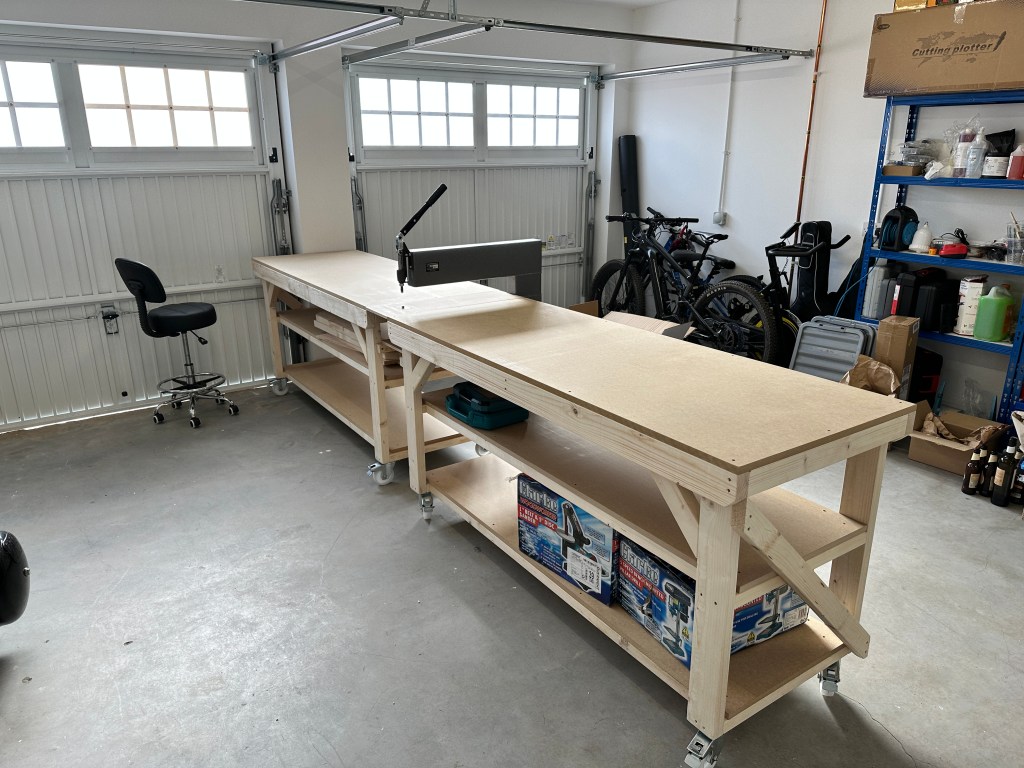
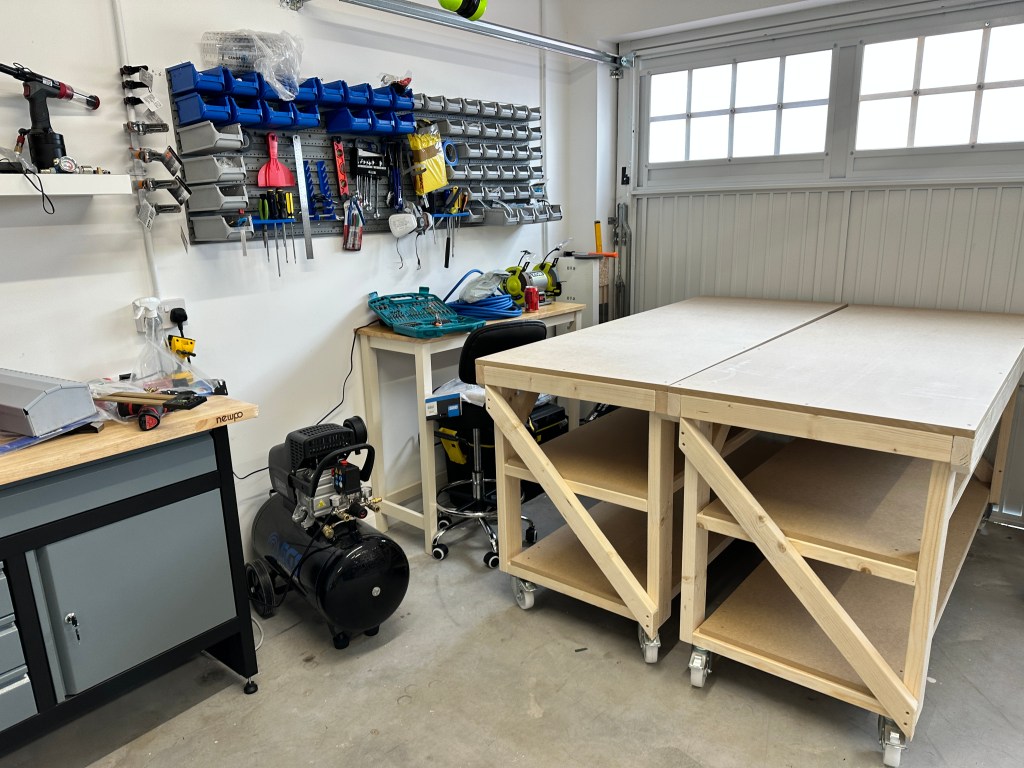
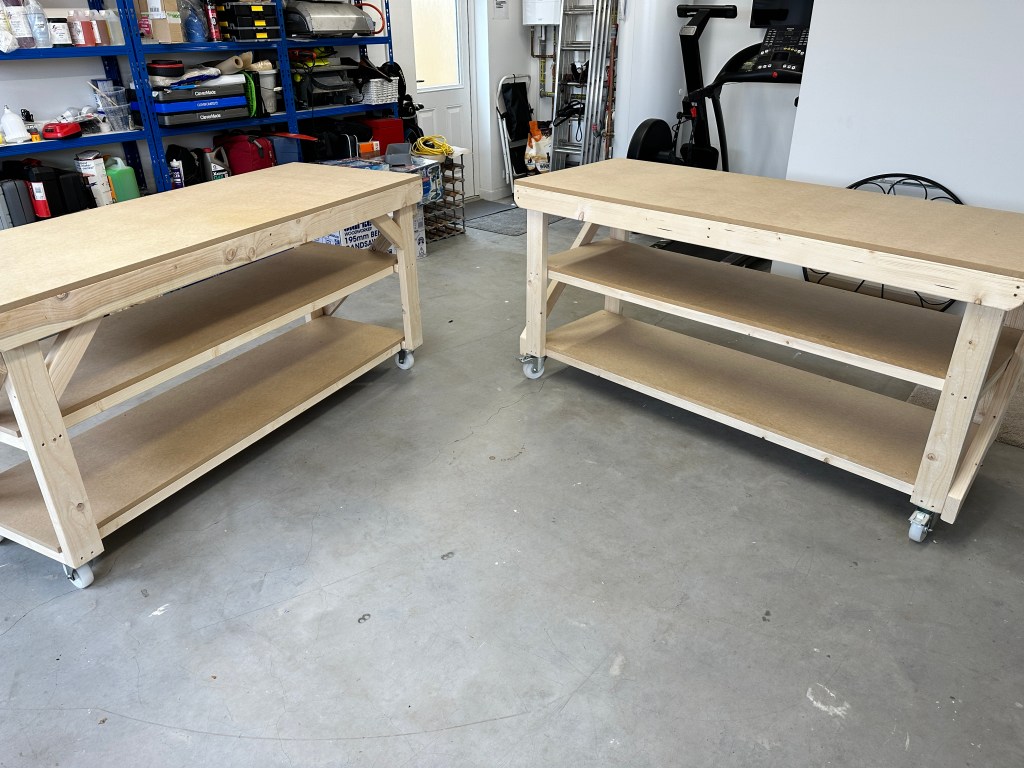
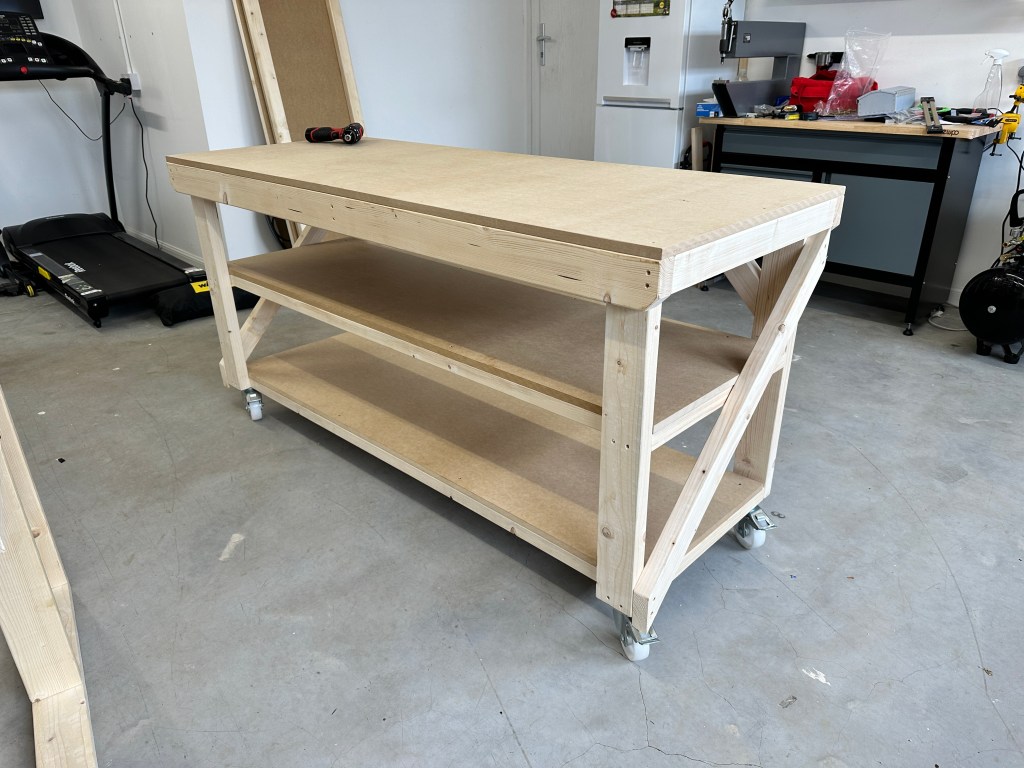
Every builder swears by the EAA workbenches, so I set about looking up the instructions, and what wood I’d need – that was a slight challenge as 2×4 in the UK isn’t the same as the US – which would mean I’d have to mess with the measurements – but not the end of the world.
Anyway, the more I looked and priced up the wood, the more I wondered if there was any pre-built solutions. I came across a company selling workbenches that were pretty much the spec I needed (Arbor Garden Solutions)- so I decided to just buy 2 of them with 2 shelves each with wheels.
They arrived today after around a 2 week wait, and they were super simple to put together, 10 minutes per bench at the most – really impressed by the quality, they are sturdy, straight and level, and ready to go!
So, as per my previous post I started out by comparing the process of alodining vs spraying, so here’s some ramblings about the results of that test, which has also resulted in trying a 3rd product.
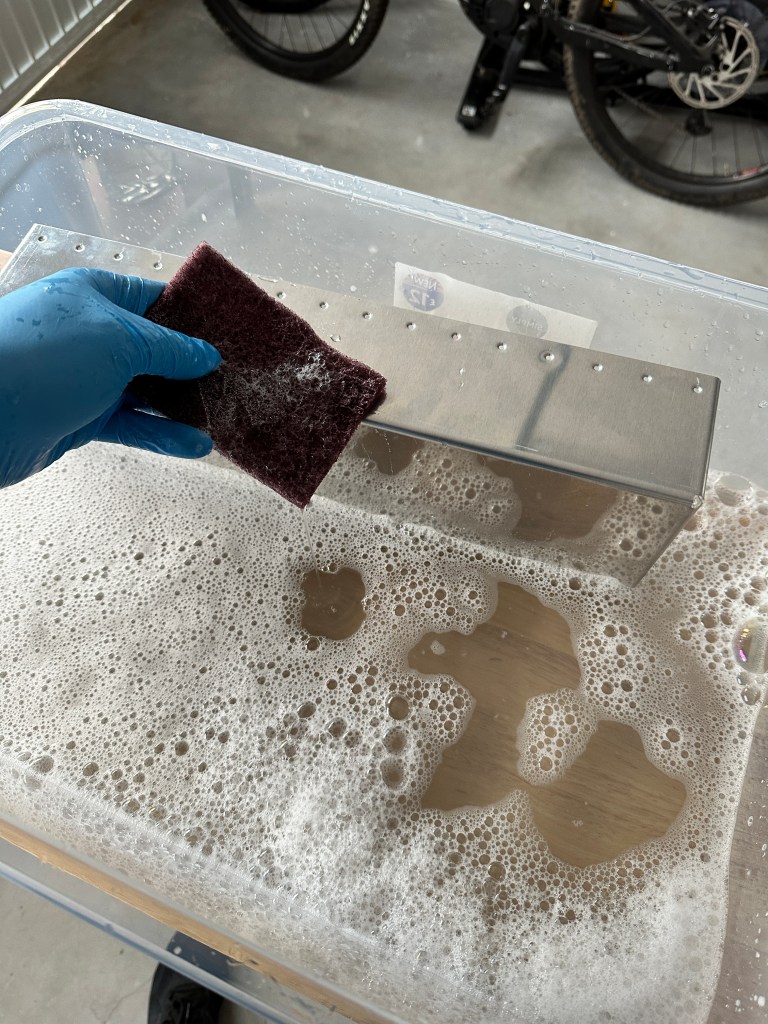
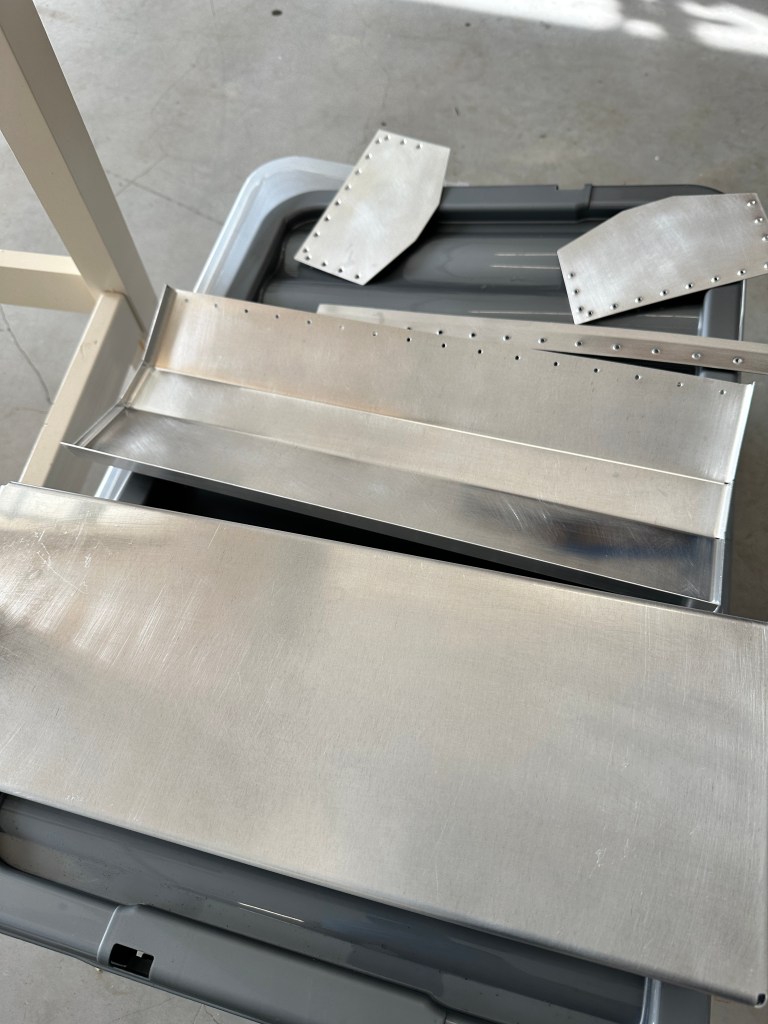
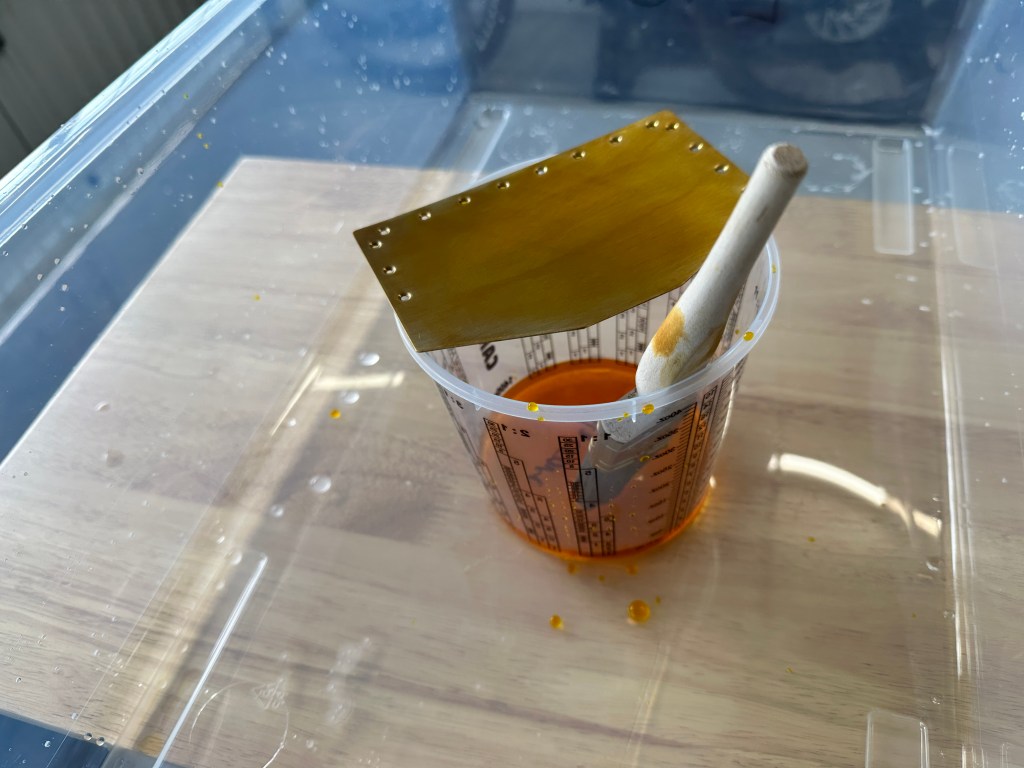
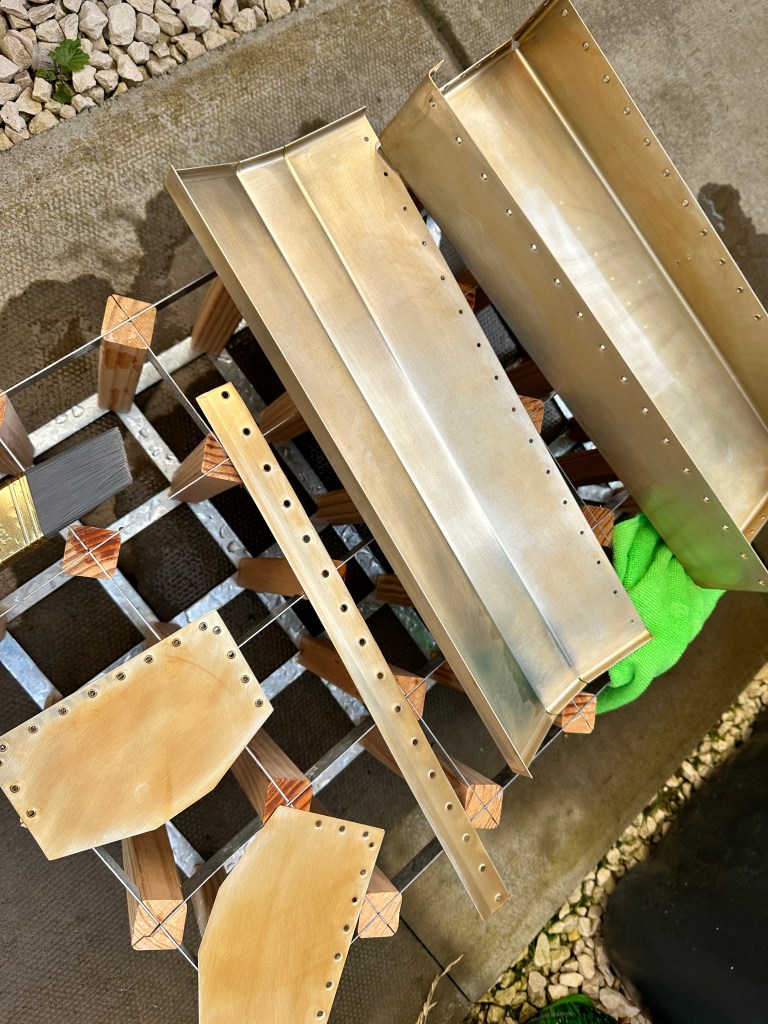
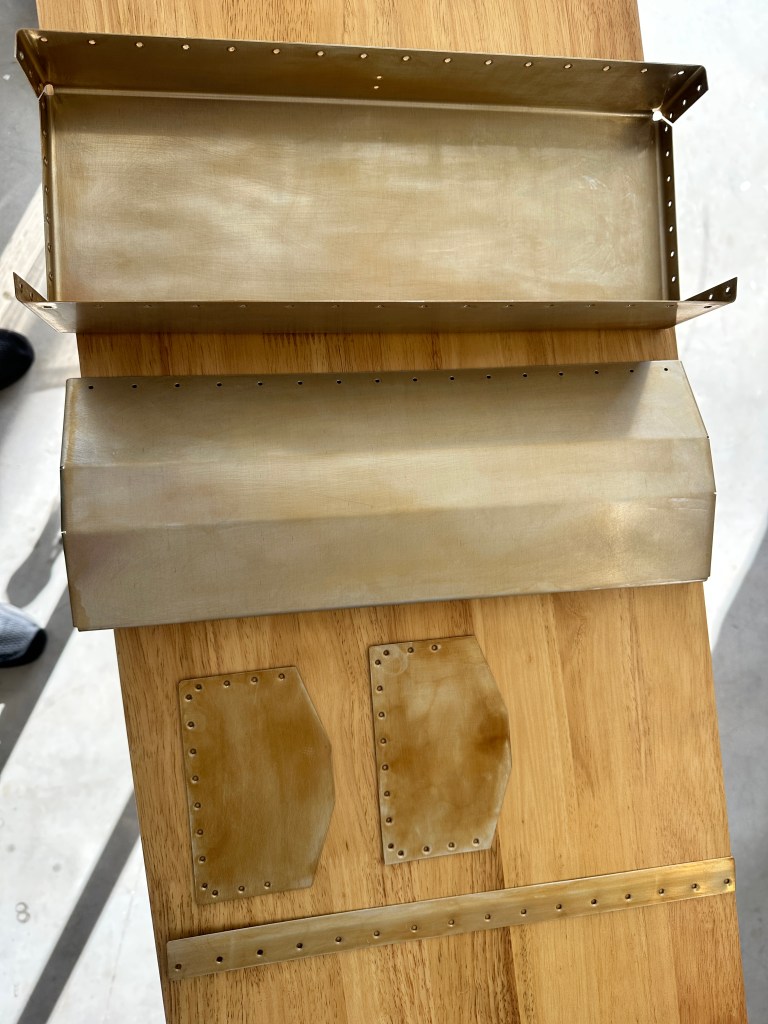
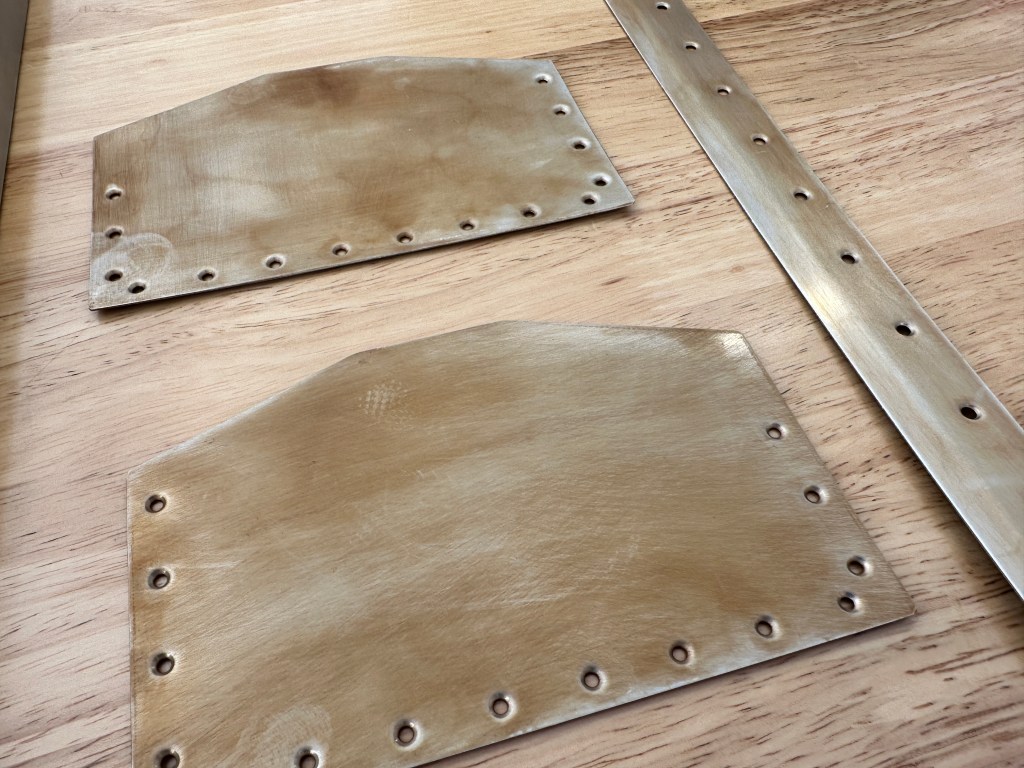
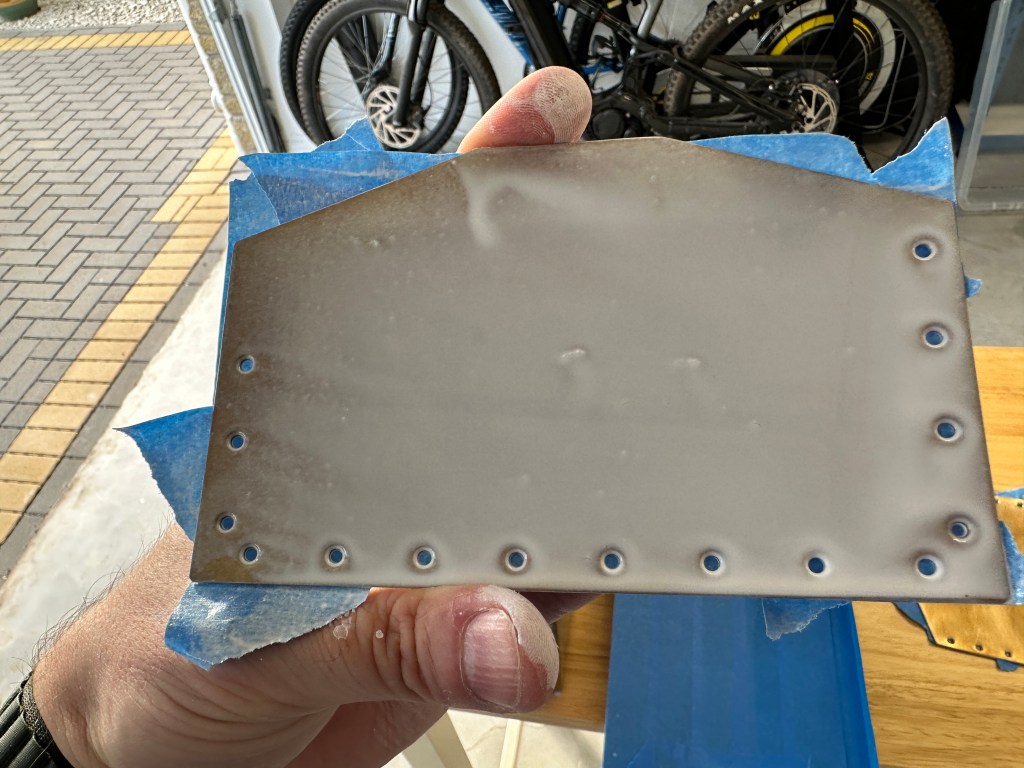
Alodine The results I achieved from this process actually look good. The parts came out with a golden color, maybe slightly darker in some areas – but I think that might be because I applied it with a brush instead of submerging the parts in a solution.
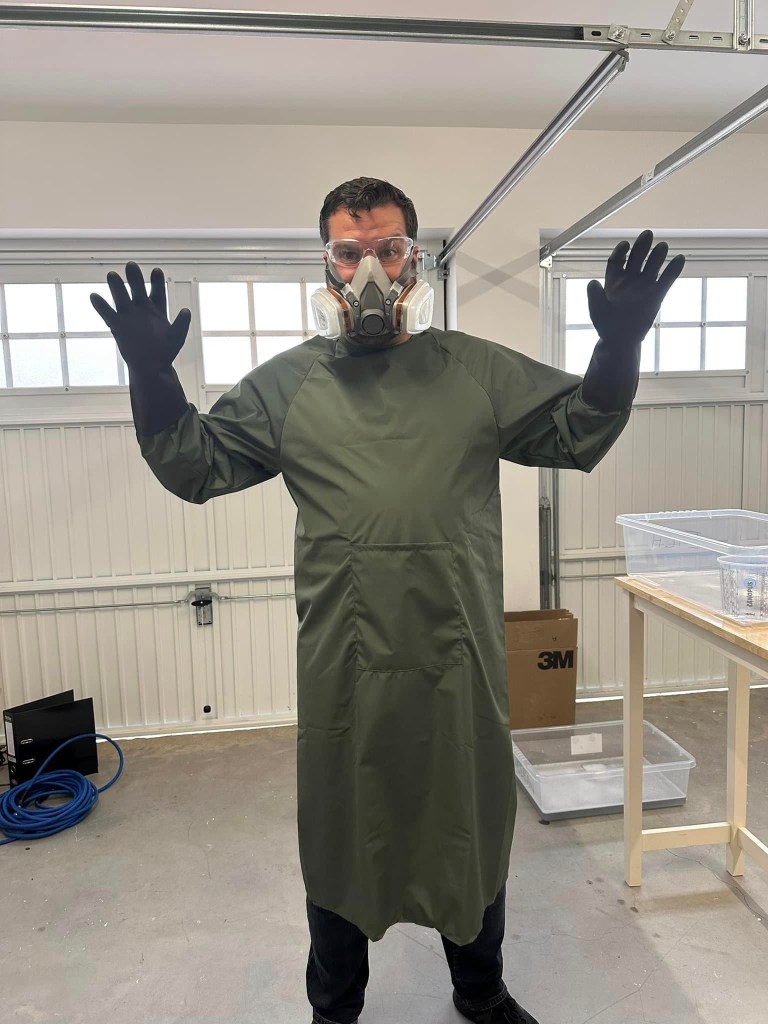
The first step after cleaning involved brushing on Deoxidine. I could really smell the vapor despite wearing a mask, and it was quite strong – so I ended up ventilating the area more and stepping outside for a while. It did a good job of cleaning the parts, so I proceeded to the next step.
Brushing on the Alodine (which I mixed from 2 parts) was really easy. I didn’t notice as much vapor smell as with the Deoxidine, and using a brush helped minimize waste. I left it on the parts for 2 minutes, constantly brushing more onto them to keep them wet – although I think it may have needed more time. Compared to spraying, I definitely prefer this method. However, when considering the volume and size of the parts I would be working on in the kit, there are some practical challenges that I would need to overcome.
EkoPrime This was basically a total failure, no doubt all because of me and my lack of experience, but here are a couple of things that I think contributed to it – and maybe I’ll try again.
Firstly, I have no experience with a spray gun, I watched many videos on YouTube about how to set up the gun, spray patterns, etc, but still felt like a complete beginner. My compressor is small, and I used the inexpensive gun that came with it, so maybe that really affected the process – I’ve ordered another gun to see if it makes a difference (although I may return it if the other options are better).
Secondly, I wonder whether the alodined parts didn’t have the bite needed for the paint? I’d obviously went through an etch phase before the alodine process, but it didn’t seem like the paint was settling, it just seemed to sit on the surface liked spilled milk – I decided to wipe it off which was surprisingly easy…
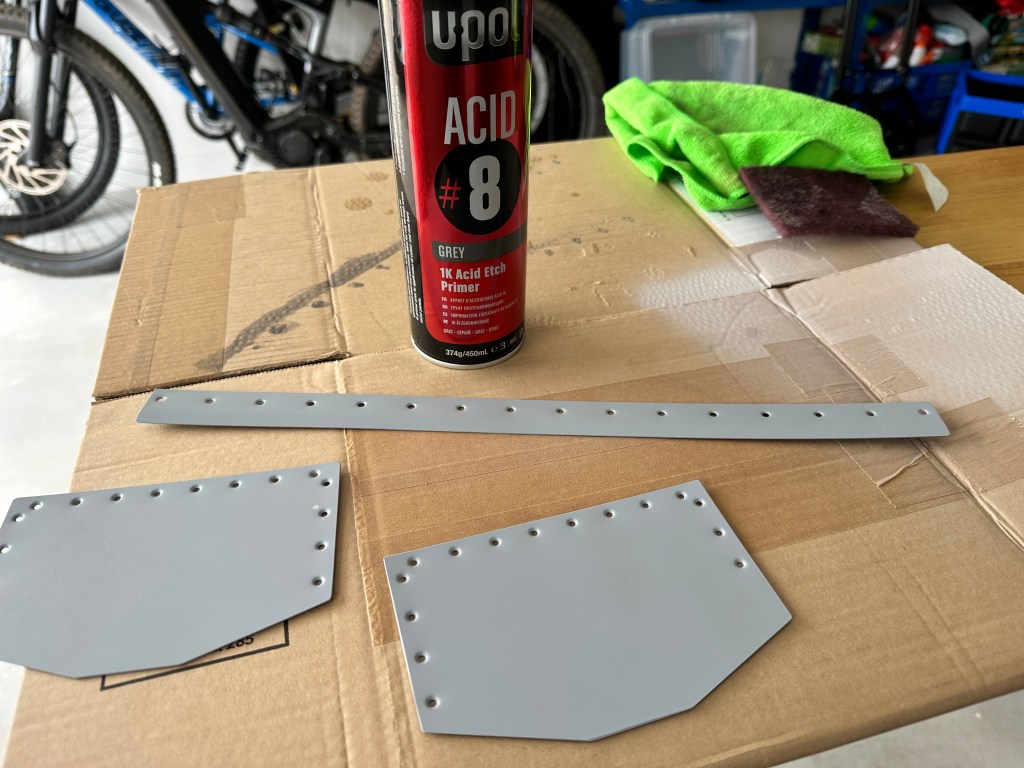
Upol Acid 8 1K Etch Primer I had originally planned to compare Alodine and spraying, but after spraying didn’t work at all and the Alodine process involved a lot of chemicals, I decided to try an etch primer in an aerosol can instead.
I had previously seen good results from people using Upol Acid 8 1K Etch Primer, which you can buy from Halfords. So, I went there and bought a can of it. You can also get it in a tin for spraying, but I didn’t want to go down that route because of my previous unsuccessful attempt.
Using the aerosol can to spray the primer on the parts was really easy and enjoyable. It required very little clean-up, except for some overspray. The primer went on the parts smoothly and in a thin layer, and it was easy to use without needing a lot of equipment.
I’m almost certain that this is the method I will choose to use!
Honestly, this has to be my least favourite subject so far – there seems to be an endless amount of products and methods, and every time I do research I feel like I come away thinking about it completely differently.
There’s lots of discussion that aluminium has good built-in corrosion resistant aluminium so perhaps in the end it doesn’t matter so much which direction you go as it’ll ultimately just add to the existing resistance.
However, after hours of research, trawling facebook groups and forums, I still feel pretty uninformed about it all – but have decided that it probably comes down to which process I prefer to work with.
To help make that decision I have decided to try 2 methods (Alodine vs Spraying), this should help narrow down the next choice of product, especially if I prefer the Alodine method.
Given that I don’t have my empennage kit yet, and probably don’t want to use any of that for “testing” anyway, I will prime my Vans Toolbox. My plan is to Alodine everything first and then spray EkoPrime on the outside of the parts, this should give me an insight into which process is easier to work with.
Here’s a few notes on each of the 2 products I’ll be testing:
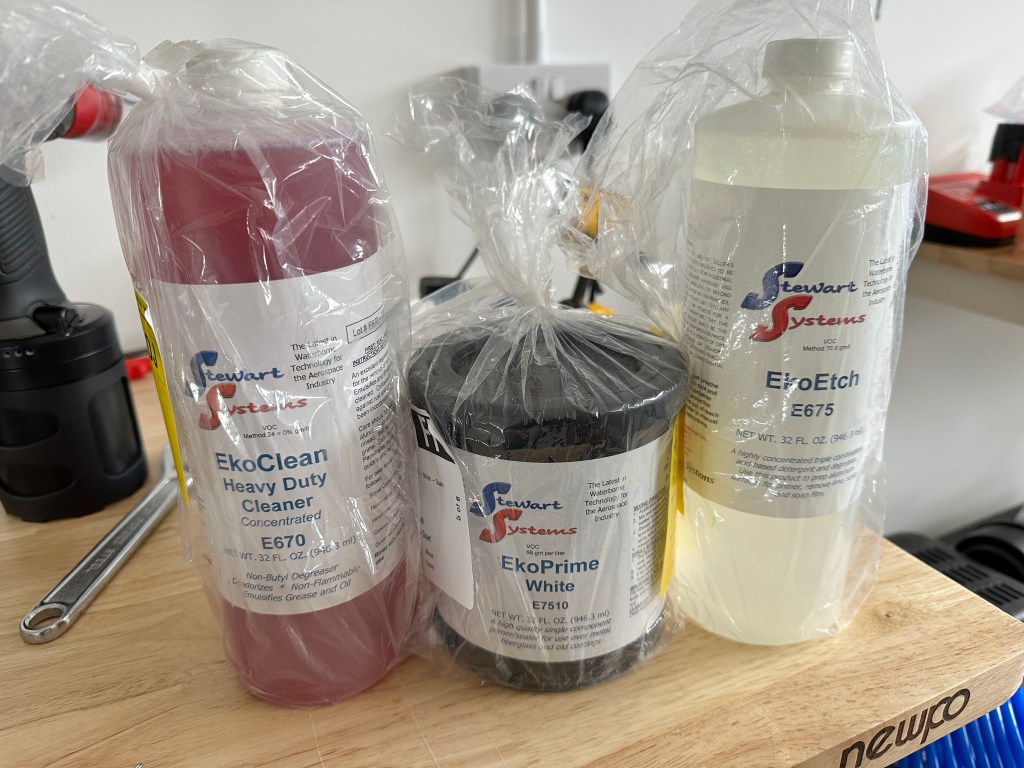
Alodine (using ALOCROM 1200 + Deoxidine 624)
Doesn’t add as much weight to the aircraft (vs paint primers)
Simple to work with (doesn’t need a spray gun, compressor etc)
Potentially less messy, and can be brushed on
May be difficult to dispose of excess (people seem to suggest making concrete)
Can be purchased in the UK from LAS
EkoPrime + EkoEtch + EkoClean (Stewart Systems)
Seems to be a popular choice for Vans
Water based so easier to clean up vs epoxy based paints
1-part – so slightly simpler to use smaller quantities
Can be purchased in the UK from LAS
Requires more complex process (spray booth, gun, compressor, suit etc)
Not sure if my compressor will be good enough for HVLP gun
I’ve never used a spray gun in my life, so that concerns me!
The first step on the journey to building an aircraft is preparation! For me that has taken 2 years of researching, learning about techniques, and looking at every possible aircraft kit out there!
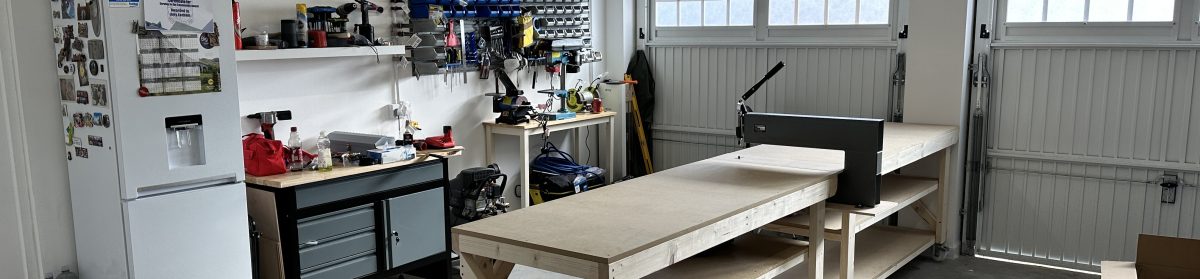
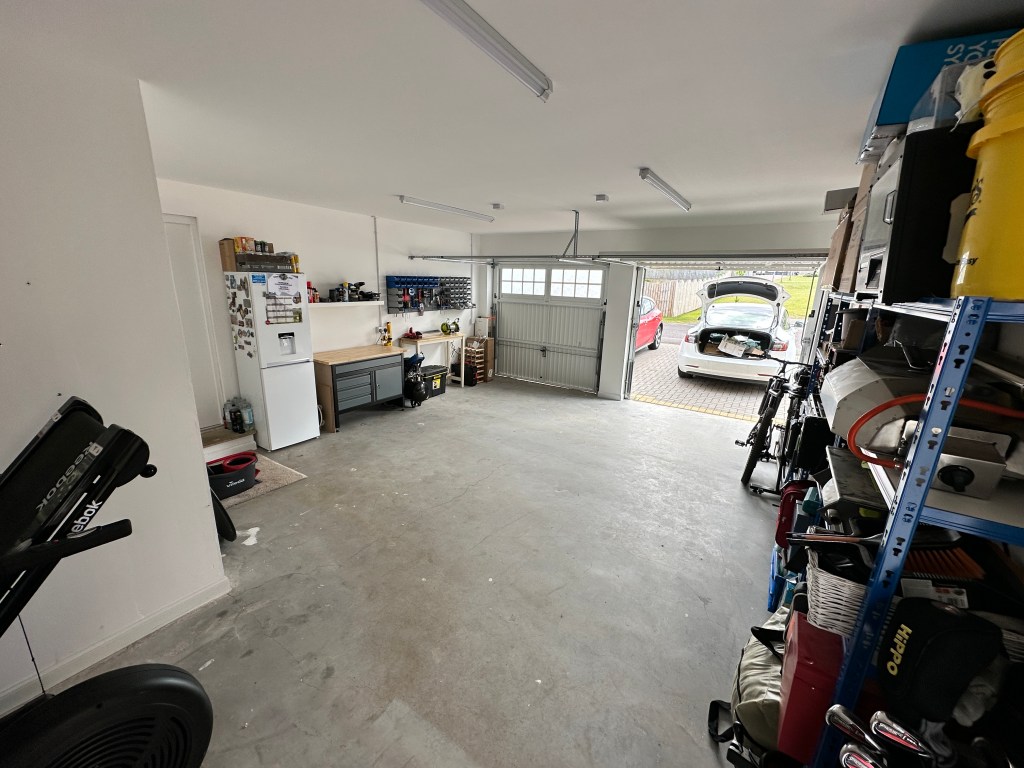
I’m fortunate to have a 2 car garage which I expect should be large enough to work in, so I spent the weekend taking rubbish to the recycling centre, organising everything, I even mopped the floor!
I’ve got 2 workbenches on order that roughly meet the spec of the EAA workbench that is mentioned on numerous posts, but I decided to just order them instead (hopefully a good plan)!
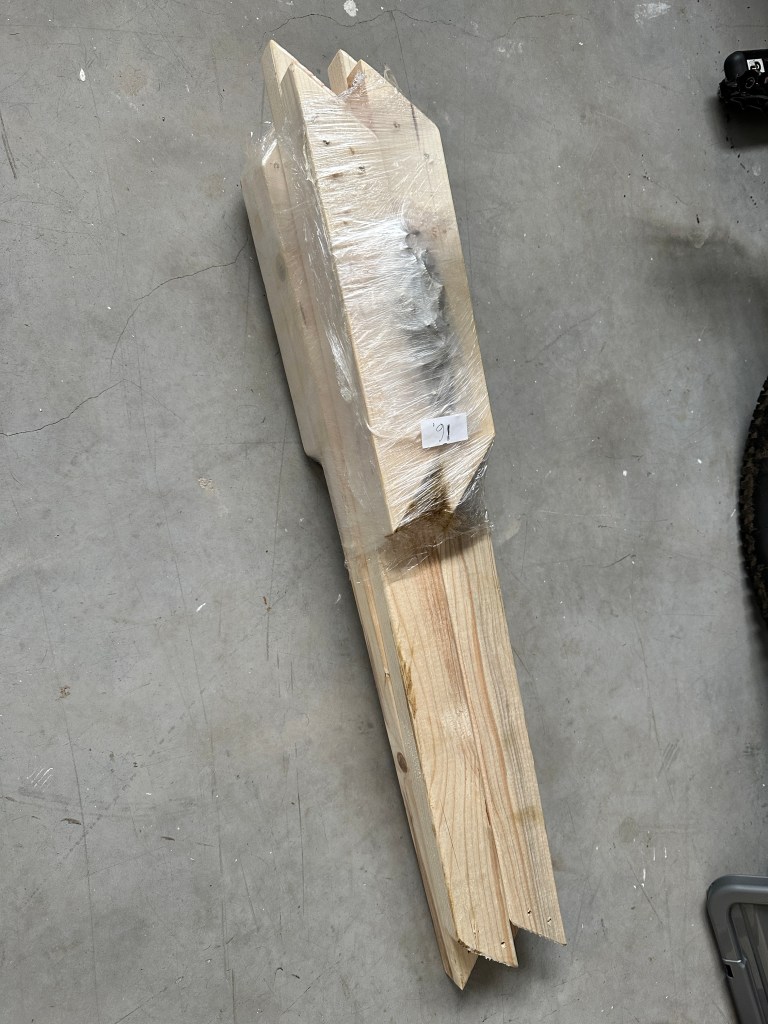
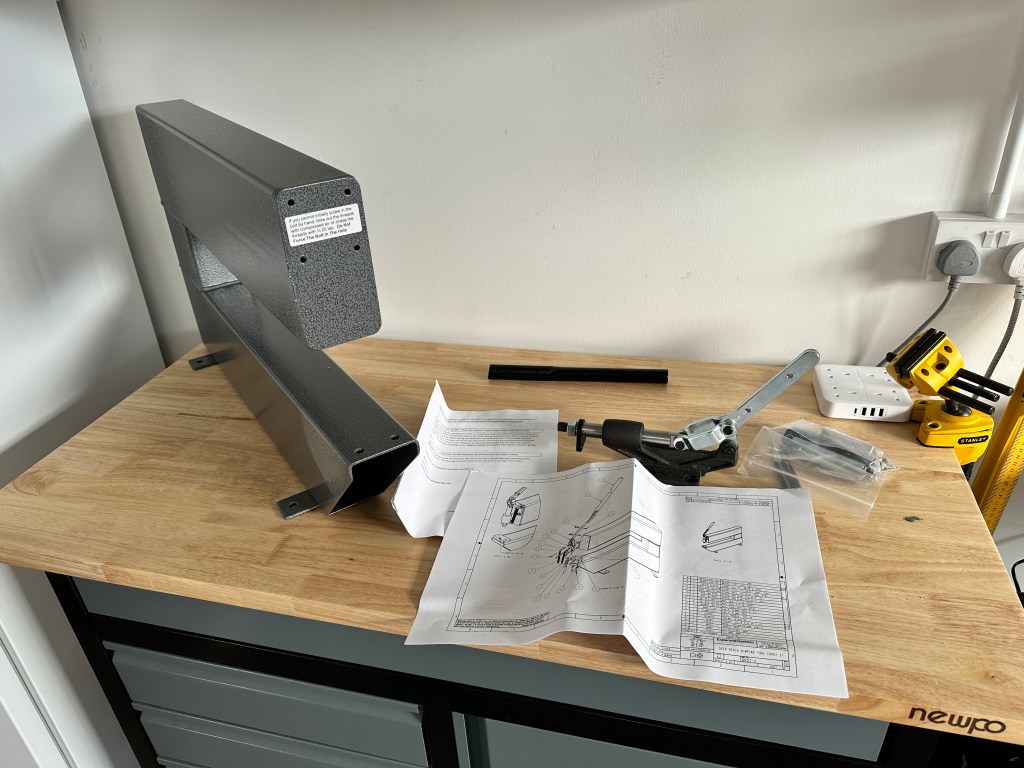
When I almost pulled the trigger on building previously I bought some tools, such as the DRDT-2 dimpler, which I bought in Jan of 2021- it’s never been out of the box until today! So time to set that up, and give it a try!
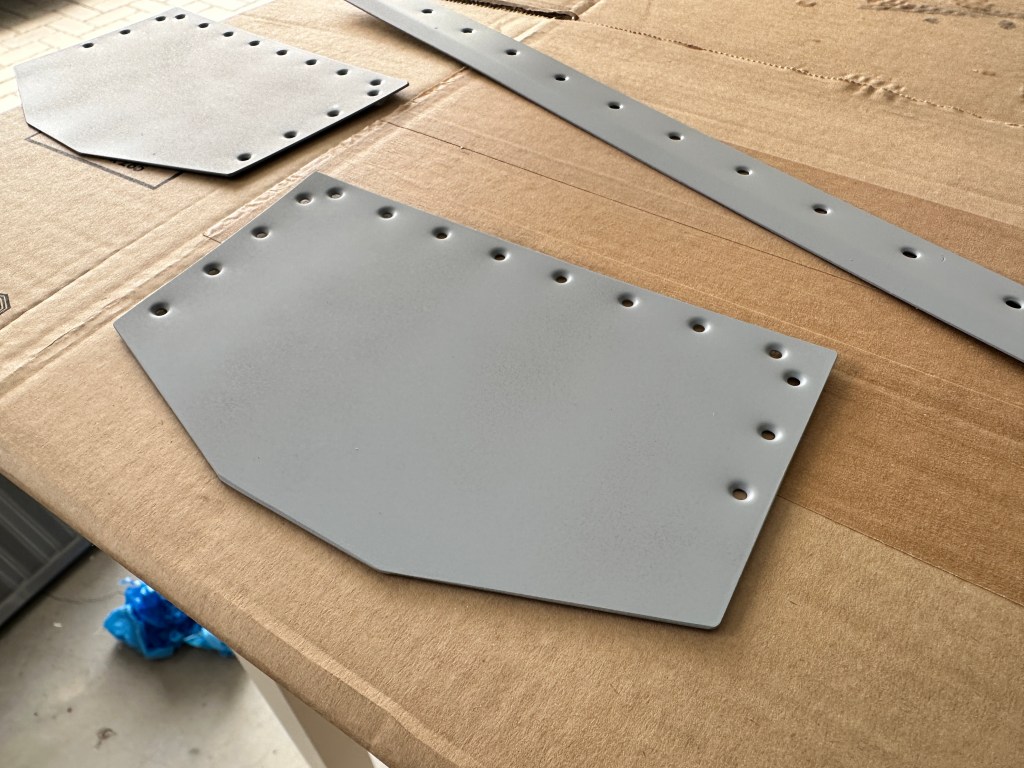
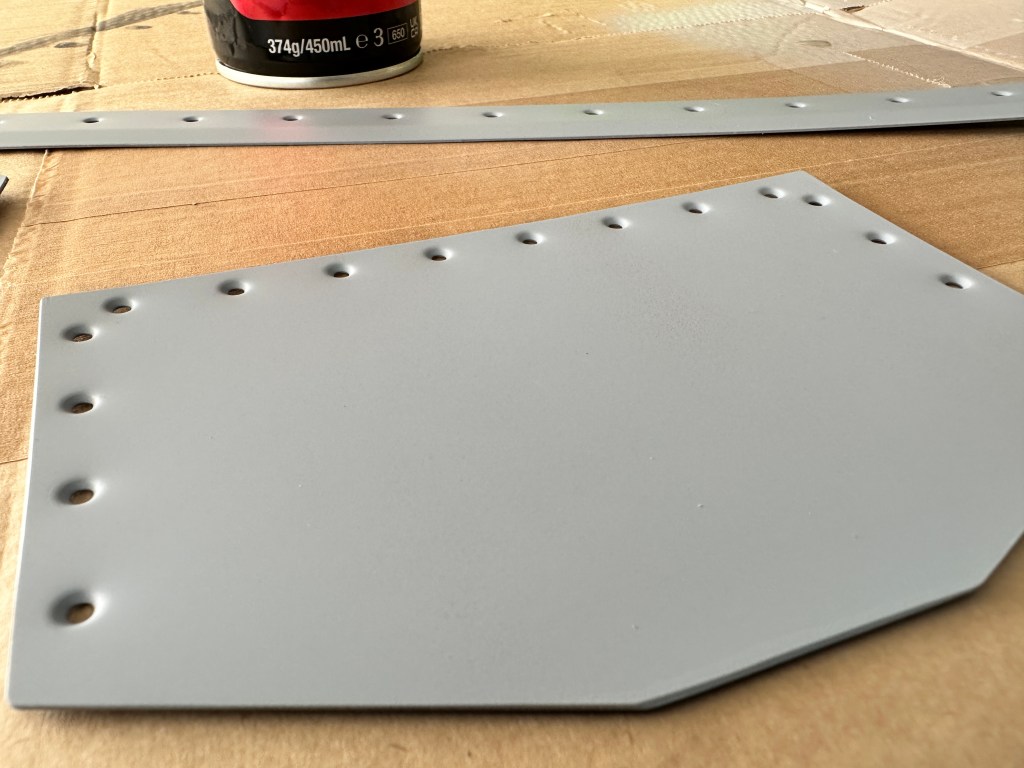
Another item I bought back in 2021 was the Vans Toolbox Practice kit, which I have made a start to – I plan to just mess around with it and get a feel for working with aluminium, I’m also going to use it as a test process for priming with Alocrom 1200 (Alodine).
Using this first entry on the website to keep a record of various products, and associated UK suppliers of them as I gather items required for the build: